











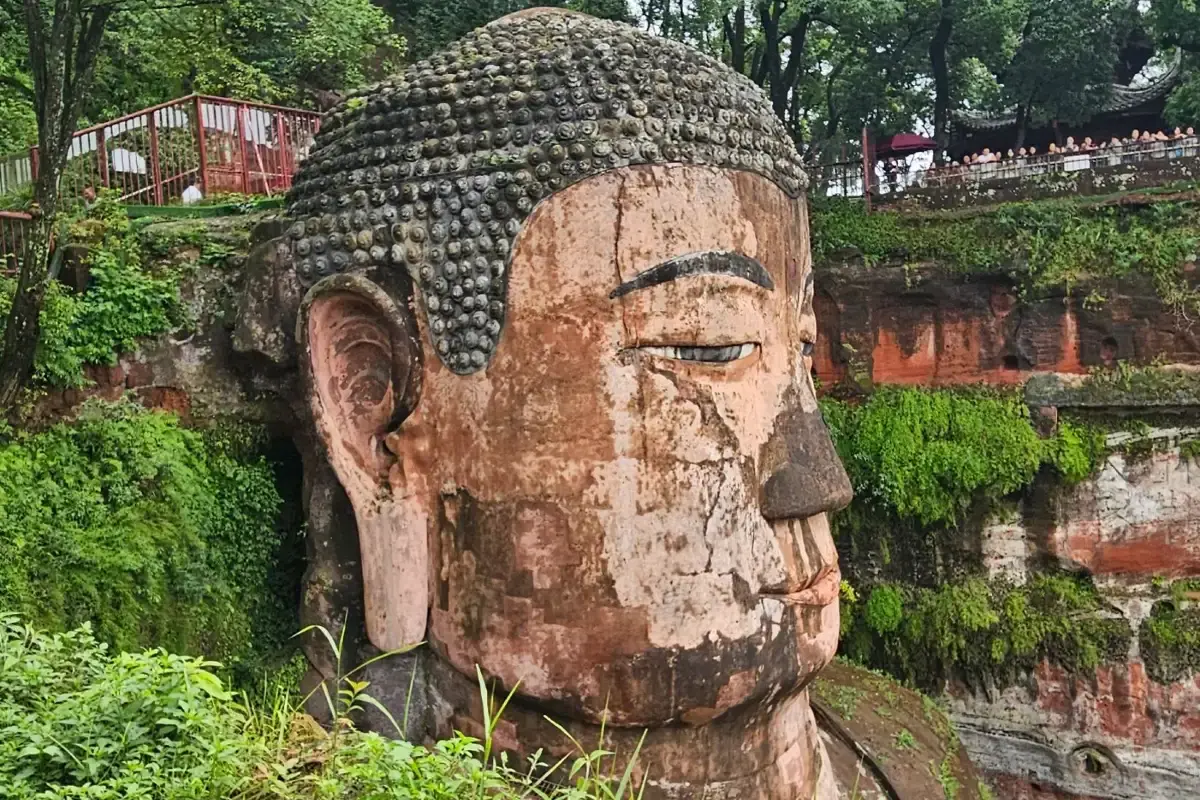
Photographing the Leshan Giant Buddha is a study in scale: a 71-metre statue carved into a cliff, wrapped in queues of visitors and viewed from boats, stairs and temple courtyards. The good news is that the subject does the heavy lifting for you. This guide breaks down the eight spots that produce the shots everyone wants, plus the timing, gear and etiquette that separate a great Leshan portfolio from a phone roll of random rocks.
🧾 Quick Facts
- 📷 Best light: soft morning light and golden hour on the red sandstone
- 🙈 Quietest shooting: before 09:00 or after 15:30 on weekdays
- ⏱ Recommended time: 3–5 hours for the full shot circuit
- 🎟 Entry from $11.84 (standard entry around 80 yuan)
📷 Gear Reality: Your Phone Is Enough
You do not need a professional kit for the Buddha; you need a plan. The statue is enormous, so even a wide phone lens captures it, and the real challenges are crowds and contrast, not focal length. If you carry a mirrorless camera or DSLR, a 24–70mm equivalent covers every spot in this guide, from tight texture shots to the full frontal from the river.
- A polarising filter cuts glare on the river and deepens the sky above the cliff.
- A spare battery matters: a 3–5 hour circuit drains phones faster than a city walk.
- A wrist strap or light bag helps on the narrow plank road, where one-person traffic leaves no room to swap lenses.
📍 The 8 Best Photo Spots, Spot by Spot
Each spot below sits along the classic route or on the water. You can shoot all eight in one long day, or pick three and shoot them properly.
🏛 1. The Head Platform: Scale from Above
Walk the cliff top to the platform level with the Buddha’s head and you get the shot most visitors never think to take: looking down over the statue’s hair buns and shoulders towards the rivers. It instantly communicates scale — people at the feet become ants — and morning light falls softly across the face here. Shoot portrait orientation to include the cliff edge in the frame.
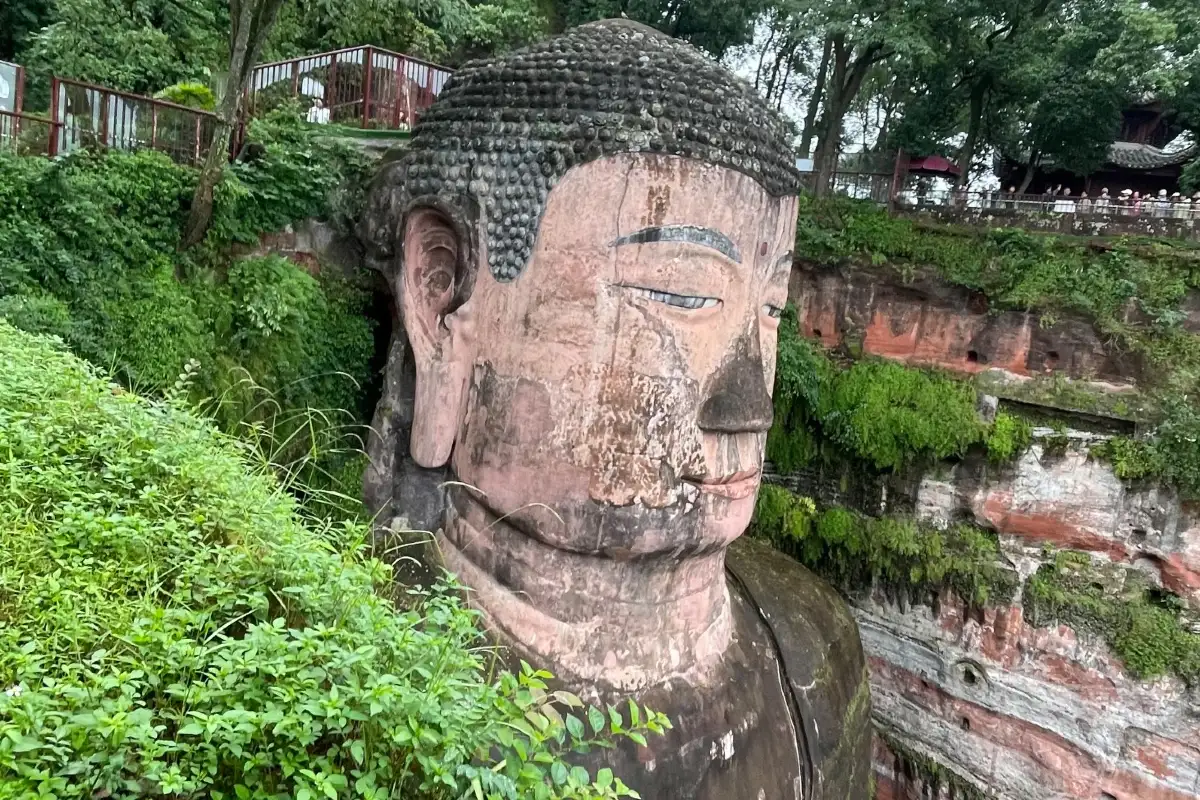
🪜 2. The Plank Road: Textures Up Close
The cliff descent past the statue is a texture workshop. From the narrow ledges you pass close to the carved hair buns, the long ears and the deep folds of the robe, close enough to see the chisel work and the weathering of the red sandstone. Space is tight and traffic is one-way, so shoot fast with a standard lens and keep moving.
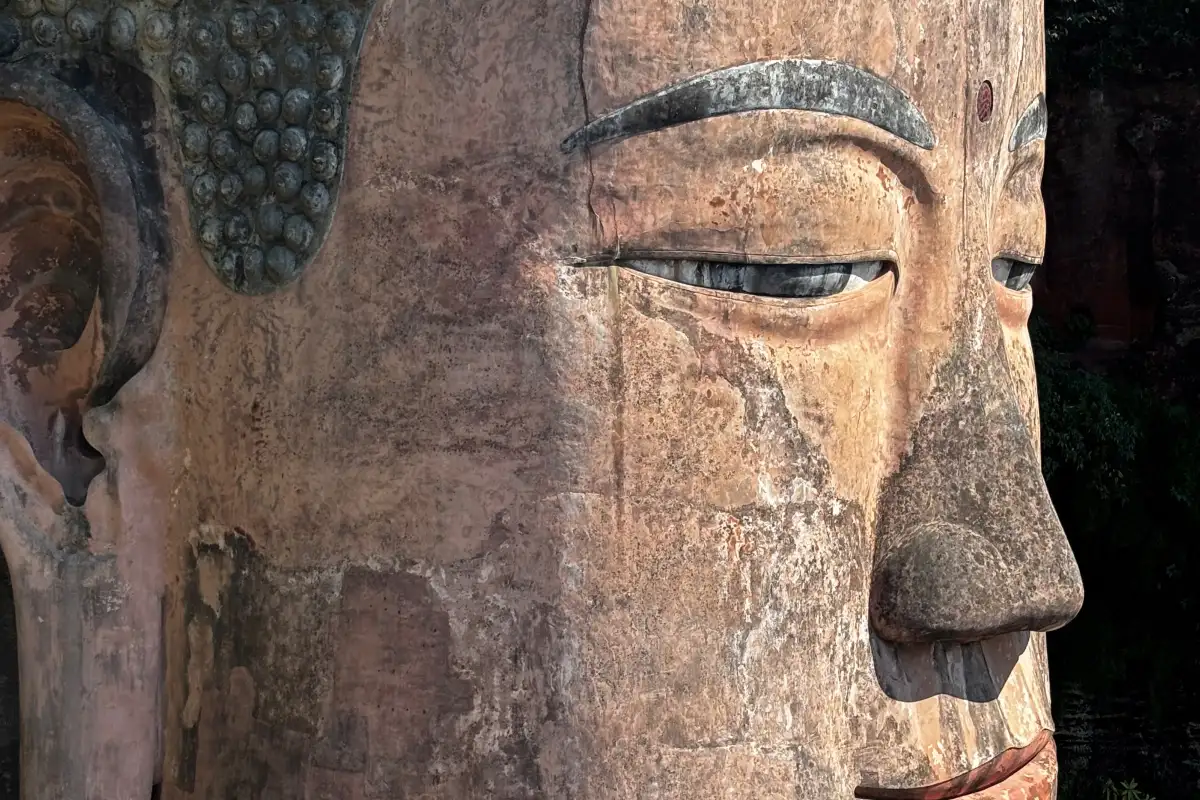
🦶 3. The Feet Platform: The Classic Look-Up
At the bottom of the stairs, the feet platform delivers the canonical shot: the statue towering straight above, with the instep beside you wide enough to hold over a hundred people. An ultra-wide lens — or your phone’s 0.5x — is essential to fit the whole figure, and the real trick is patience: wait for a gap in the crowd flow, then shoot low and wide. Midday sun flattens the detail here, so this spot rewards an early arrival.
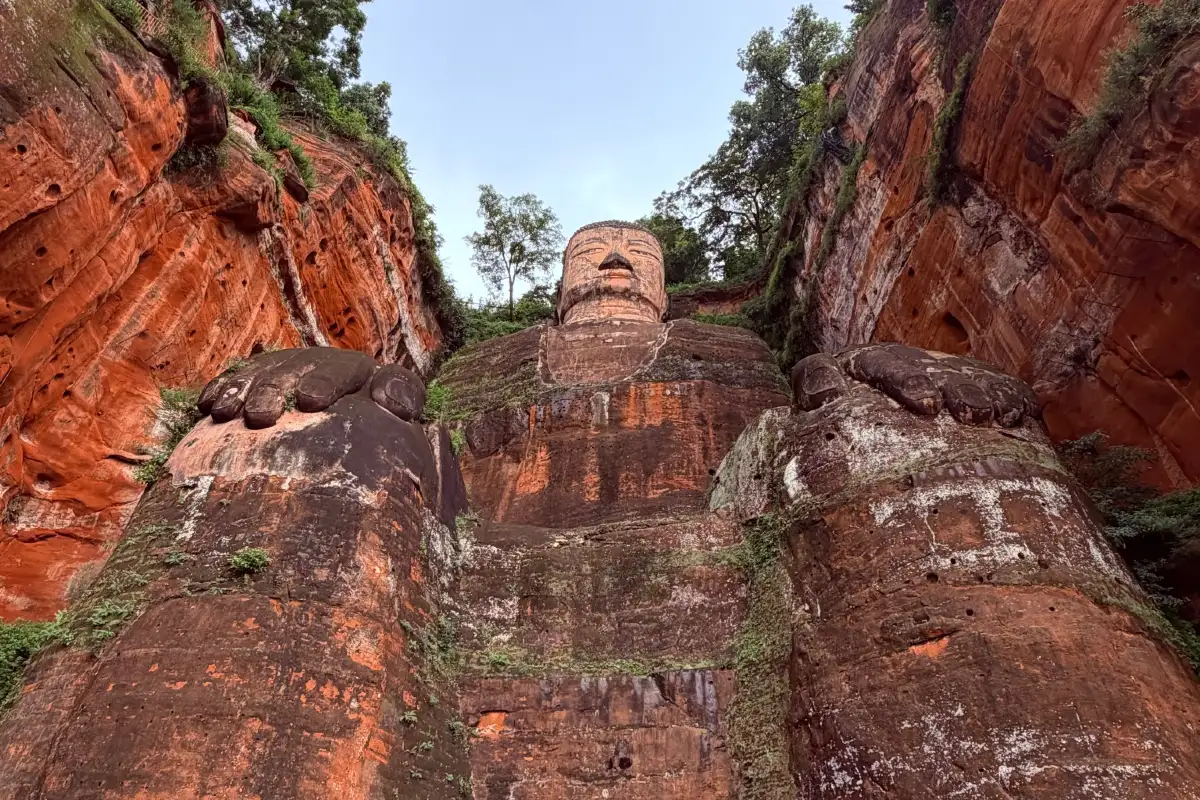
⛴ 4. From the River: The Only Full Frontal
The cruise boats give you the one angle the cliff cannot: the entire statue face-on, framed by river and sky. Reflections on the water make beautiful foregrounds in calm weather, and the moving boat demands a shutter speed fast enough to keep the statue sharp — on a phone, tap and hold to lock focus and burst-shoot as the boat aligns. If you are weighing the two approaches, our boat cruise vs cliff stairs guide compares them in detail.
🌆 5. The Old Town Riverside: The Hidden Second Buddha
From the Leshan city riverfront, look across the water and the landscape itself becomes the subject: the outlines of the Wuyou, Lingyun and Guicheng mountains form a giant reclining Buddha, with the seated statue at its chest. Photograph it at golden hour as a silhouette, and layer the lit city riverfront in the foreground for a shot nobody else in your feed will have. The story behind this “Buddha within a Buddha” is told in our Wuyou Temple guide.
🛕 6. Lingyun Temple Courtyards: Red Walls & Incense
The temples above the Buddha are a different kind of subject: red walls, curved eaves, incense smoke curling through doorways and glimpses of the rivers beyond. Shoot wide for the architecture, then slow down and look for details — braziers, lanterns, worn stone steps. Be respectful in active worship halls; photograph the atmosphere rather than worshippers’ faces.
🌇 7. Golden Hour at the Cliff Corner
As the sun drops, the red sandstone turns warm amber and the statue’s face gains depth that midday light erases. Find a vantage on the cliff-corner paths where the statue and the river catch the last light together, and bracket a few exposures if you shoot stills — the contrast between lit rock and shaded water is strong. Golden hour is short, so arrive fifteen minutes early and be set up before the light peaks.
🌃 8. Night & City Angles
After dark the story changes: the riverside and the statue are illuminated, and the city lights double in the water. The night cruise is the easiest way to shoot the lit Buddha from the water, and our night river cruise guide explains the timing and what to expect. From the old-town bank, longer exposures blend the lit statue, boat trails and reflections into a single frame.
🌅 Light & Timing: When the Buddha Looks Best
Light makes or breaks this subject. The face sits in soft, even light in the morning, which is why early visits produce the most flattering portraits of the statue; by midday the sun is harsh and the detail washes out; golden hour warms the sandstone dramatically. Winter’s low sun stretches the warm light across most of the afternoon, another reason the quiet season rewards photographers. For month-by-month weather, crowds and light, see our best time to visit guide.
🙈 Crowd-Free Shooting Strategies
The Buddha is one of China’s most visited sights, and crowds are the main obstacle between you and a clean frame. Arrive before 09:00 and you can often shoot the head platform, and even the plank road, with minimal waiting; after 15:30 the tour groups thin out again. Weekday afternoons are reliably calm, and winter weekdays are the quietest window of the year. On holidays, accept reality: shoot from the river cruise or the cliff top, where visitors spread out rather than queue single file.
🤝 Etiquette: Great Photos, Good Manners
The narrow paths enforce their own etiquette, and following it makes better pictures for everyone. A few rules of thumb:
- Never block the plank road to compose — one-person traffic means your setup time is everyone else’s waiting time.
- Drones are not automatically permitted here; check local drone rules and obtain any required permission before flying near the site.
- Ask before photographing monks and worshippers, and skip flash in the incense halls.
- Trade the prime feet-platform angle: shoot quick, rotate out, and let the next person in.
📊 The Shot List at a Glance
| Spot | Suggested lens | Best time | Difficulty |
|---|---|---|---|
| Head platform | Standard 24–70mm | Morning | Easy |
| Plank road textures | Standard or short telephoto | Early, quiet days | Tricky — tight space |
| Feet platform look-up | Ultra-wide / phone 0.5x | Early morning | Easy but crowded |
| River cruise frontal | Standard zoom | Morning or golden hour | Easy — moving boat |
| Old town silhouette | Standard to telephoto | Golden hour, night | Easy |
| Temple courtyards | Wide | Anytime | Easy |
| Golden hour cliff corner | Any | Sunset window | Moderate |
| Night angles | Fast lens or phone night mode | After dark | Moderate — long exposure |
❓ FAQs
Do I need a professional camera for the Buddha?
No. A modern phone covers every spot in this guide; a 24–70mm equivalent zoom is all the extra you need, plus a polariser if you plan to shoot from the water.
When is the face lit best?
Morning brings soft, even light on the face, and golden hour warms the whole statue. Midday is the least flattering — shoot textures or the river view instead.
Are drones allowed at the Leshan Giant Buddha?
Do not assume so. Drone use near the site is restricted; check local drone rules and obtain any required permission before you fly.
What is the best no-stairs photo spot?
The river cruise — full frontal view, no climbing at all. The old-town riverside is the second choice, with the reclining Buddha silhouette thrown in for free.
How do I avoid people in my shots?
Shoot before 09:00, favour weekday afternoons, and use the crowd gaps at the feet platform. In editing, a tighter crop or longer lens compresses the scene and leaves the queue behind you.
The Buddha has held the same pose for over 1,200 years, so the pressure is all on your timing, not your subject. Pick three or four spots from the list, arrive early or late rather than at midday, and be generous on the narrow paths — then your Leshan photos will look the way the statue deserves.
Ready to See the Giant Buddha?
Tickets start from $11.84 and the scenic area is open 08:00–19:00 (admission ends 17:30).
🎟 Book Tickets on Trip.com 🎫 Check Klook Prices
Affiliate disclosure: as a Trip.com affiliate we may earn a commission when you book through these links — at no extra cost to you.